Home Coffee Roasting in a Hot Air Popcorn Maker
One of the best ways to always have the freshest coffee possible is to roast your own at home. There are many ways to accomplish this, but perhaps the easiest & least expensive is to use a hot air popcorn maker. There are quite a few brands that will work just fine, the trick is that it uses hot air to heat the beans rather than an oil method. We’ll go into a little more detail later in this post.
At home we use a regular Behmor home roaster appliance which is a great machine. (I’m working on a review of it for this site at a later date.) In Lima, we have friends that can roast larger batches (2-10 kilos) for us, but when we want a little for us right away, we just use a our popcorn maker.
It’s a fairly simple concept really, the best air popcorn makers for coffee will have a small rotating chamber that circulates the beans while forcing hot air through the beans allowing them an even roast. It should blow the air outward, and will typically have small vent fins at the bottom. Avoid any that have a steel mesh in the bottom as they don’t work as well.
What’s particularly nice with the popcorn maker is that they typically will have a clear plastic top that will allow you to see the color of the beans as they roast. Be sure to roast in a well lit area to take full advantage of this.
Big Fat Disclaimer – In most cases the use of a hot air popcorn maker will exceed the manufacturers allowed specifications. You can literally be playing with fire by roasting coffee this way. This is not a walk away situation. If you have to make a phone call, go to the bathroom, or answer the door, stop now! When you’re completely ready to devote 4-9 minutes to roasting then begin. We don’t recommend this method, use this material only for educational purposes!
All popcorn makers are not the same! We use an example of our own popcorn maker & times, quantities etc will vary by machine. Start small & see what happens. Please read the entire post & check out the resources below.
Let’s Get Started
Here’s What You’ll Need:
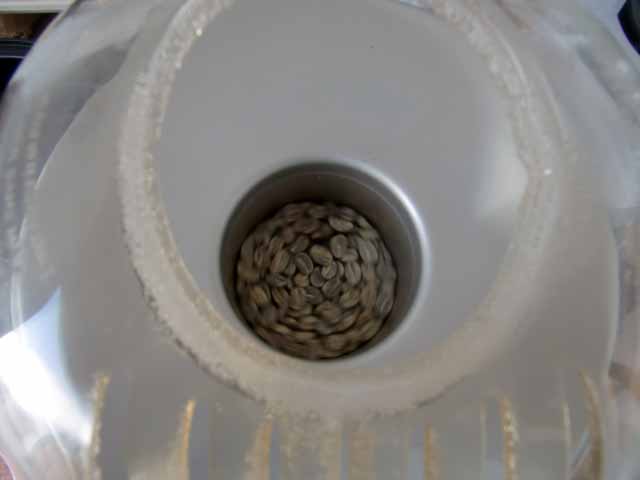
60 Grams (A little over 2 ounces, 1/4 cup) Green (raw-unroasted) Coffee Beans
Hot Air Popcorn Maker*
Colander (Metal Preferred)
An Additional Metal (non plastic) Bowl
Another bowl to catch coffee chaff (or box, pot whatever)
Stopwatch or Other Timer
Notebook or paper for taking notes – Optional
Potholders or oven mitt
Large spoon or spatula (wood preferred)
Prepare for Roasting
Pick your place for roasting and gather your materials in that site. This roasting will make smoke & coffee chaff will typically be blown around. It’s fairly easy to clean up the chaff, but roasted coffee smoke tends to linger. If it’s not too cold you can go outside, if not be near a window or near a stovetop vent.
Start the Roast
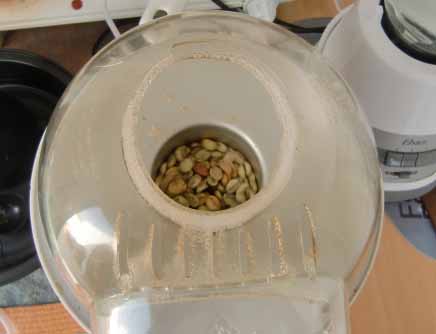
Measure out about 60 grams of green coffee beans and start a timer that we have on our smart phone so that we can monitor the roasting time for future reference. Turn on the popcorn maker and add the coffee beans. As you add the beans, watch for the circular motion to slow somewhat. Once you see the slowing, stop adding beans. If you use all of the green coffee beans add more until you see the slowing in the cylinder. ( I usually will have a couple of measured amounts ready to add if necessary.)
![]()
For the first couple of minutes, the coffee beans begin to warm, and some of the thin coffee chaff begins to separate from the coffee and blow out from the machine. The beans begin to change color from green to yellow.
Over the next minute or so, the beans begin to change color from yellow to a light brown.
As the beans darken some light smoke will be produced, at first with more of a “straw” aroma, and then to a sweeter more coffee like smoke.
First Crack
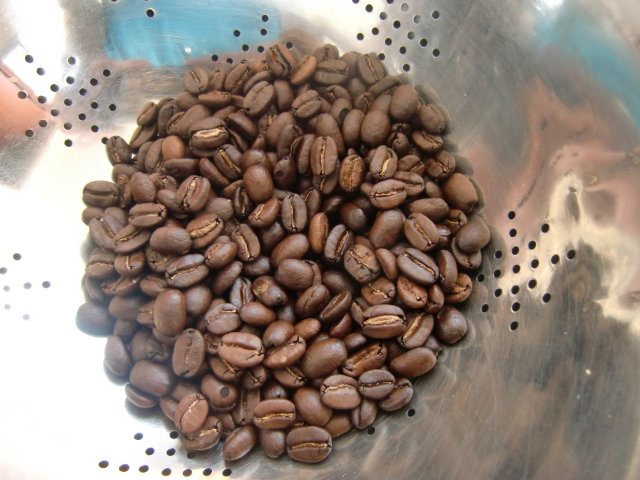
After approximately 3.5 – 4 minutes* (can vary a bit depending on the hardness of the beans, temperature of the popcorn maker etc) we’ll hear the telltale first crack. We continue to watch as the color changes from brown, to a darker brown. The cracking and popping of the coffee beans continues for a few (1-3) minutes. Depending on how you prefer your coffee (a light roast vs a darker roast) you can stop the roast now, or wait as it continues to darken.
*This is where everything depends on the popcorn maker, quantity, temperature, everything; it’s the critical time to pay attention to the color of the beans listening, watching, and smelling.
Second Crack
There are a few seconds of silence (can greatly depend on the bean) and the crackling of the second crack begins.** We immediately stop the popcorn maker, and pour the roasted beans into a large metal bowl.
**Depending on how dark you want it, you may want to go into second crack longer (be careful!) This is where a fire can start, or you can burn your coffee. Always stop the roast before the coffee reaches your desired roast level as it will continue to roast after you stop the popcorn maker. You will want to be 10-15 seconds “ahead” when roasting.
Cooling the Beans
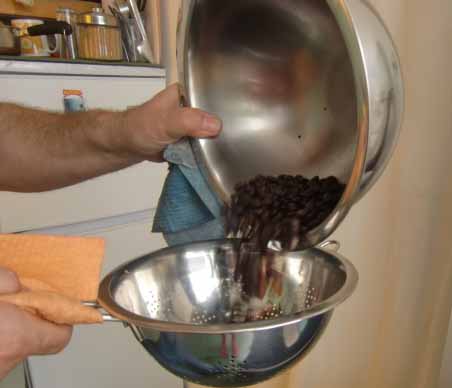
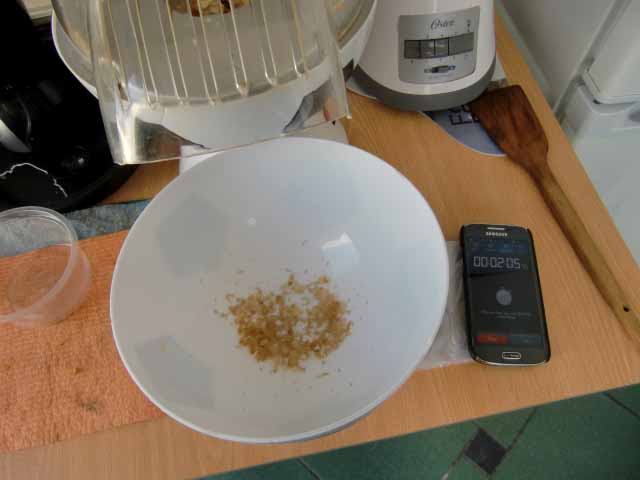
Working between two bowls we pour the beans from one to the other while blowing to clear any remaining coffee chaff from the coffee as well as continue cooling the coffee.
The coffee is now ready. You can use it right away, but the best flavor is after the coffee has “rested” for a day or two. For storage, a mason jar works well, but be sure to leave the lid loose for the first day as fresh roasted coffee will “gas” CO2 for a day or so. Coffee should be stored in a cool, dark place and never in direct sunlight.
Notes:
* Here are some known good popcorn makers:
West Bend Air Crazy
West Bend Poppery II (1200 watt model)
Popcorn Pumper
Kitchen Gourmet (from Walgreens)
Toastmaster 6203West Bend Air Crazy
Presto Poplite (from Wal-mart – stock #s 04820*, 04821, and 114316)
Nostalgia Brand (Bath Bath & Beyond)
Toastess TCP-388 (also TCP-1)
(Some models are no longer available – thanks to SweetMarias for this list)
As you first begin roasting, the 60 grams (2 oz) is a good place to start as you can experiment with a small quantity & see what works for you. As you progress you’ll be able to add more beans and increase your production accordingly.
As you add more beans to the roast, you’ll have to manage the beans that come up and out of the spinning roast chamber. I use a wooden spatula to “guide” the errant beans back into the chamber. With smaller amounts you won’t normally have too many beans outside of the roasting chamber. We can now do about 100 grams of green beans which will yield about 82-84 grams of roasted coffee (about 3 oz or so.)

Coffee Terms
For the uninitiated here are a few coffee terms that may help:
First Crack – the first popping sounds (similar to popcorn) that occur as the coffee reaches the roasted phase. At this point the coffee is drinkable, and for those who prefer a lighter roast, when first crack has proceeded for several minutes (enough for most of the beans) is the point at which you can stop the roast.
Second Crack – a second series of sounds (more like Rice Krispies) crackling and faster than First Crack, this indicates a darker roast, and if left too long, will result in burnt coffee beans.
Light Roast – The coffee has reached first crack, and has a lighter brown color with the silverskin intact. Many prefer this roast, as it has the full point of origin flavors.
Dark Roast – The darker roasts have less of the flavor of the point of origin, and more of the roast flavor as the sugars in the beans have caramelized. Espresso makers generally prefer the darker roasts.
Silverskin – the thin paperlike substance in the center of the bean. Light roasts will typically still retain the silverskin, while the darker roasts may have lost the silverskin & will show more small cracks.
©2014 Ben Gangloff
You might also like:
Curibamba Coffee (It’s special to be a good coffee bean)
Did you enjoy this page? Have questions? Would like information on something to be posted here? Please drop us a line, sign up for our email list in the box to the right, or comment below.